By default, Windows 11 uses 128-bit encryption to help protect file sharing connections, which is more secure than 40- or 56-bit encryption. If you need to share files between your PC and an old PC or MacBook which still uses 40- or 56-bit encryption, it’s necessary to adjust the encryption level and make them match each other. In this tutorial we’ll show you 3 methods to change file sharing encryption level in Windows 11.
Method 1: Change File Sharing Encryption Level via Settings App
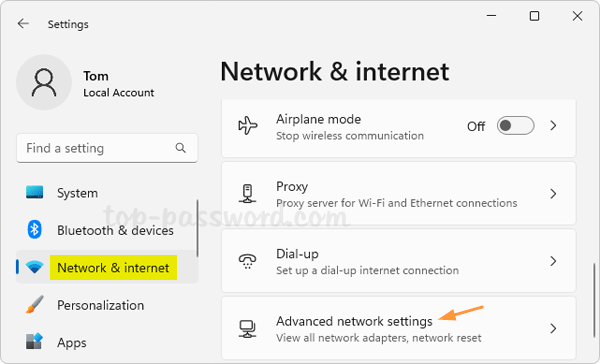
- Press the Windows + I keys to bring up the Settings app. In the left sidebar, choose Network & internet. Next, click Advanced network settings on the right.
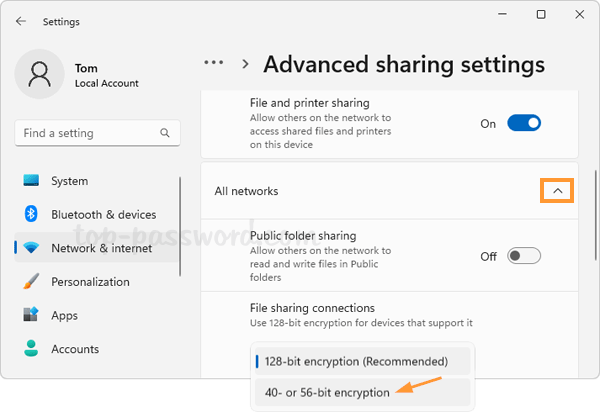
- Under the “More settings” section, click the “Advanced sharing settings” option.

- Expand the “All networks” section, you’ll see the “File sharing connections” drop-down menu. From there, you can choose to use 128-bit encryption (Recommended) or 40- or 56-bit encryption.
Method 2: Change File Sharing Encryption Level via Registry Editor
- Open Registry Editor and navigate to:
HKEY_LOCAL_MACHINE\SYSTEM\CurrentControlSet\Control\Lsa\MSV1_0. In the right pane, you should see two DWORD entries: NtlmMinClientSec, NtlmMinServerSec. We need to change their value data.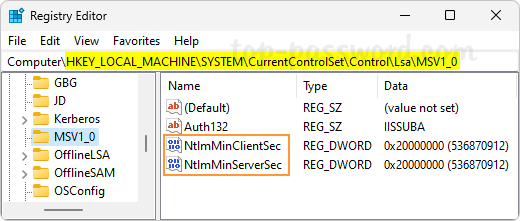
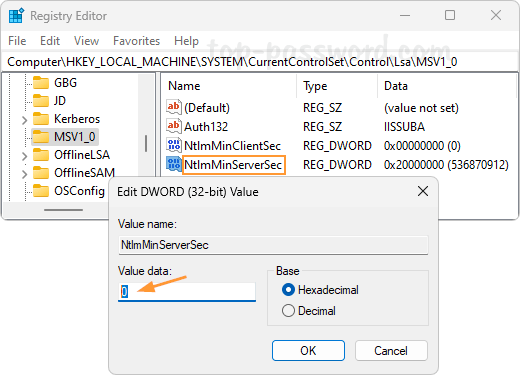
- Double-click each of them and change their value data to 0 for using 40- or 56-bit encryption, or set their value data to 20000000 (in Hexadecimal) for using 128-bit encryption.
- Close Registry Editor.
Method 3: Change File Sharing Encryption Level via Control Panel
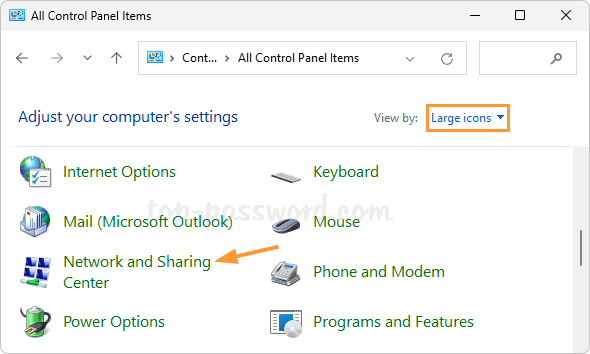
- Open Control Panel in Large icons view, click on the Network and Sharing Center category.
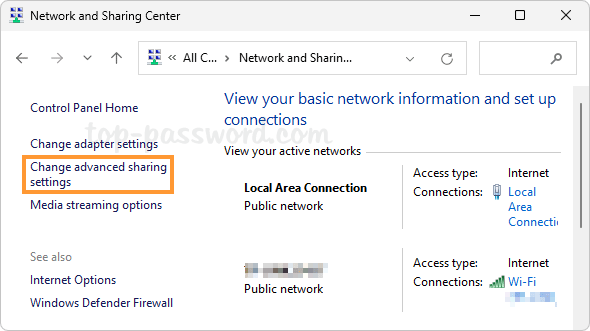
- Click the “Change advanced sharing settings” link in the left side pane.
- Expand the “All Networks” section. Under File sharing connections, you can then choose “Use 128-bit encryption to help protect file sharing connections” or “Enable file sharing for devices that use 40- or 56-bit encryption“.
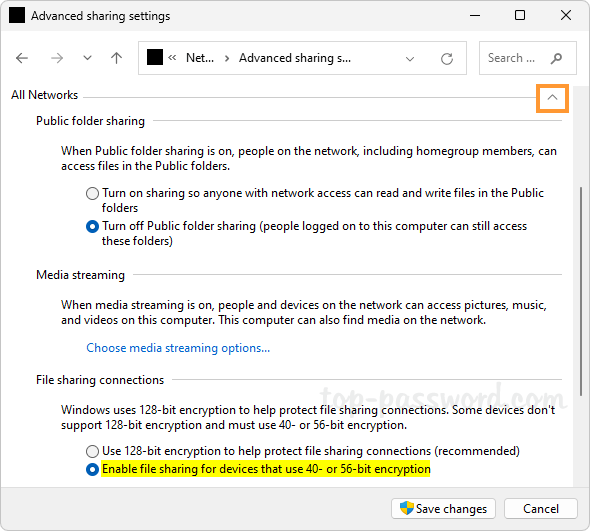
- Click on the “Save changes” button.
That’s it!